Due to the overwhelming response from my Mini Bedroom Makeover, and the wealth of questions regarding the making of the headboard, I thought it was best to write a specific post detailing how it was made and the challenges that I encountered in the process.
Step one was purchasing my wood. I chose pre-cut 6' boards from Home Depot (we have a king size bed). These are what the boards looked like once I got them home from the hardware store.
(Sorry about the photo quality -- this was a cell phone pic.) Please note: when choosing your boards, the "prettier" boards in my opinion (second board from the right) bow more than the others -- although I think it's totally worth it! :) I positioned the boards in the order that I wanted them to look on the wall, then I marked the back of each board by number order. I also put an arrow pointing in the upward direction so that I would remember the placement when I went to install the headboard.
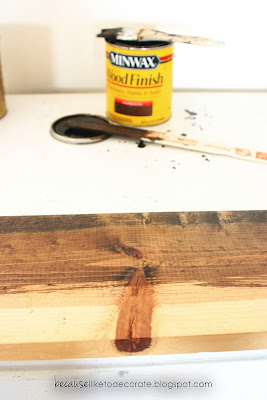
Next was the wood staining process. I moved the boards to the garage since fumes with wood stain are extremely strong. I chose Minwax in the color Jacobean and brushed the stain on in the direction of the wood grain using a cheap throwaway sponge brush. Then after each large section, I wiped with a dry rag. I just LOVE how the stain made the wood grain pop! Ideally, I would've left them in the garage for 24 hours to dry and then add a wax finish, but because of my time constraint I rushed to install them as soon as the stain was dry to the touch. I later applied the wax finish after the install and big reveal.

On each end of each board, I drilled two equally spaced holes where I wanted my drywall screws to go. I didn't bother finding studs since the boards weren't that heavy to begin with. I've hung heavier pictures on the wall using drywall screws, so I wasn't worried in the least. I measured, then positioned and leveled the bottom board first and screwed it into the wall. It's important to note that on my first try I didn't use long enough drywall screws. This required an additional trip to the hardware store, but what project doesn't? :) At the end of the day, 2" screws worked well for me. If you look closely, you may be able to tell that a couple of the boards still stick out a little bit from the wall. I'm okay with that and actually like it when these type of things aren't "perfect." That's what makes it unique and a little more rustic rather than a perfect, manufactured look.

I'm extremely happy with the results and would do it again in a heartbeat! It really is easier than it looks. If you have any further questions, please don't hesitate to send me an email
here or leave a comment below.
Lots of love,
Mary
Linked up here:


The post proνideѕ сοnfirmed helpful to me personally.
Іt’s quіte educаtional and you're certainly extremely educated in this area. You possess opened up my own eyes for you to numerous opinion of this subject using intriguing and solid content material.
Here is my blog post: http://Clickforu.com/
Eskişehir
Adana
Sivas
Kayseri
Samsun
GNT8N2